How to send Customized Bulk Direct Messages
Increase your response rate and engagement by sending personalized direct messages
4 min read
•
Jan 2, 2023
How to send Customized Bulk Direct Messages
Increase your response rate and engagement by sending personalized direct messages
4 min read
Jan 2, 2023
Sending personalized messages to your contacts is a much more effective way to reach out than sending generic messages. Personalized messages allow you to tailor your message to each individual contact, making them more likely to engage with the content. Additionally, personalized messages make your contacts feel more valued and appreciated, as they demonstrate that you have taken the time to craft a message specifically for them.
If you are looking for a way to send customized bulk direct messages to your contacts quickly, Hivoe is the right product for you.
With the help of a CSV file, you can easily do so. In this blog post, we will provide a step-by-step guide on how to send customized bulk direct messages using a CSV file as template.
The first step is to create your CSV file using Excel or Google Sheet. This includes adding the columns you want to use in your template, such as the recipient's name, and some additional variables. Once you have added the columns, fill in the data for each row.
In order to send bulk messages with Hivoe, the only constraint is the presence of the handle column.
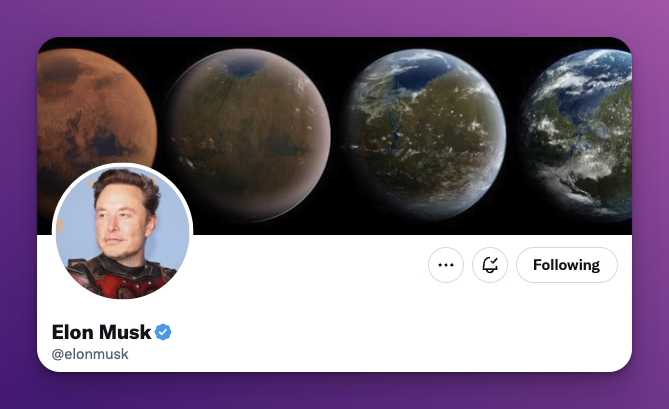
The handle, represents the Twitter nickname of the user you want to send the message to.
For instance, for Elon Musk, the Twitter handle is @elonmusk
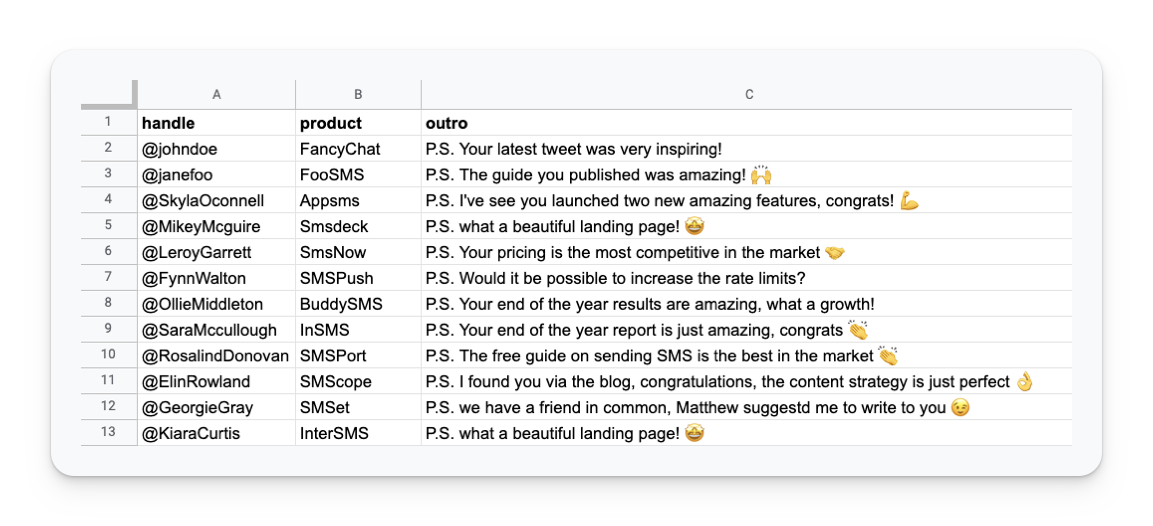
An example of CSV structure is the following, which includes the user to contact (handle), and two custom variables: product, and outro.
Once you have created and filled your CSV file, the next step is to import the CSV file into Hivoe.
Download the file from Excel or Google Sheet selecting CSV as the file format.
Once the CSV file has been selected, you’ll see a preview of the content, like:
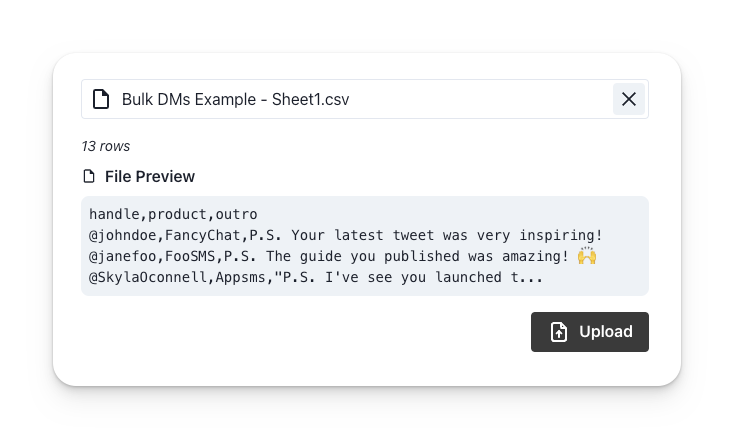
The interface will show you the number of rows, and a preview of the content.
You’re ready to click on Upload
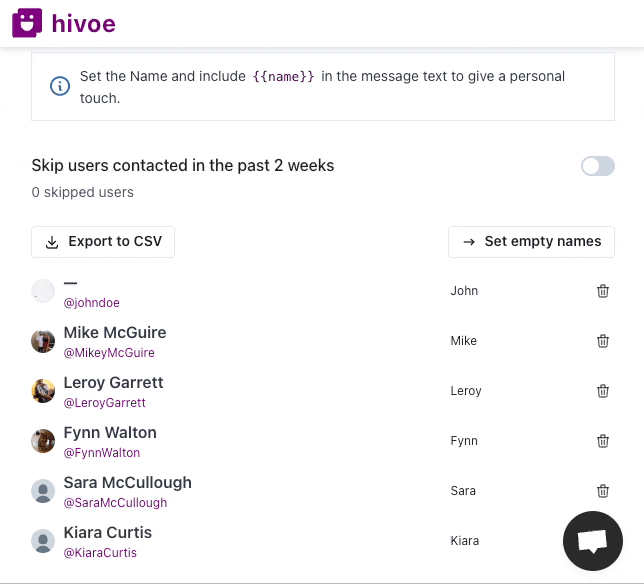
At this point, the users you included in the CSV file, are added to the list of targeted users.
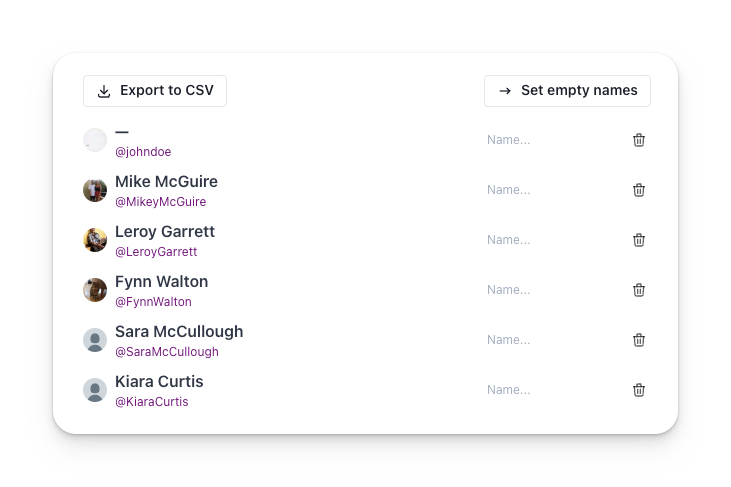
We suggest adding the name using the → Set empty names button, and manually refine the results.

By clicking on a user name, you open the user details. The variables defined in the CSV file have been created and associated with the correct user.
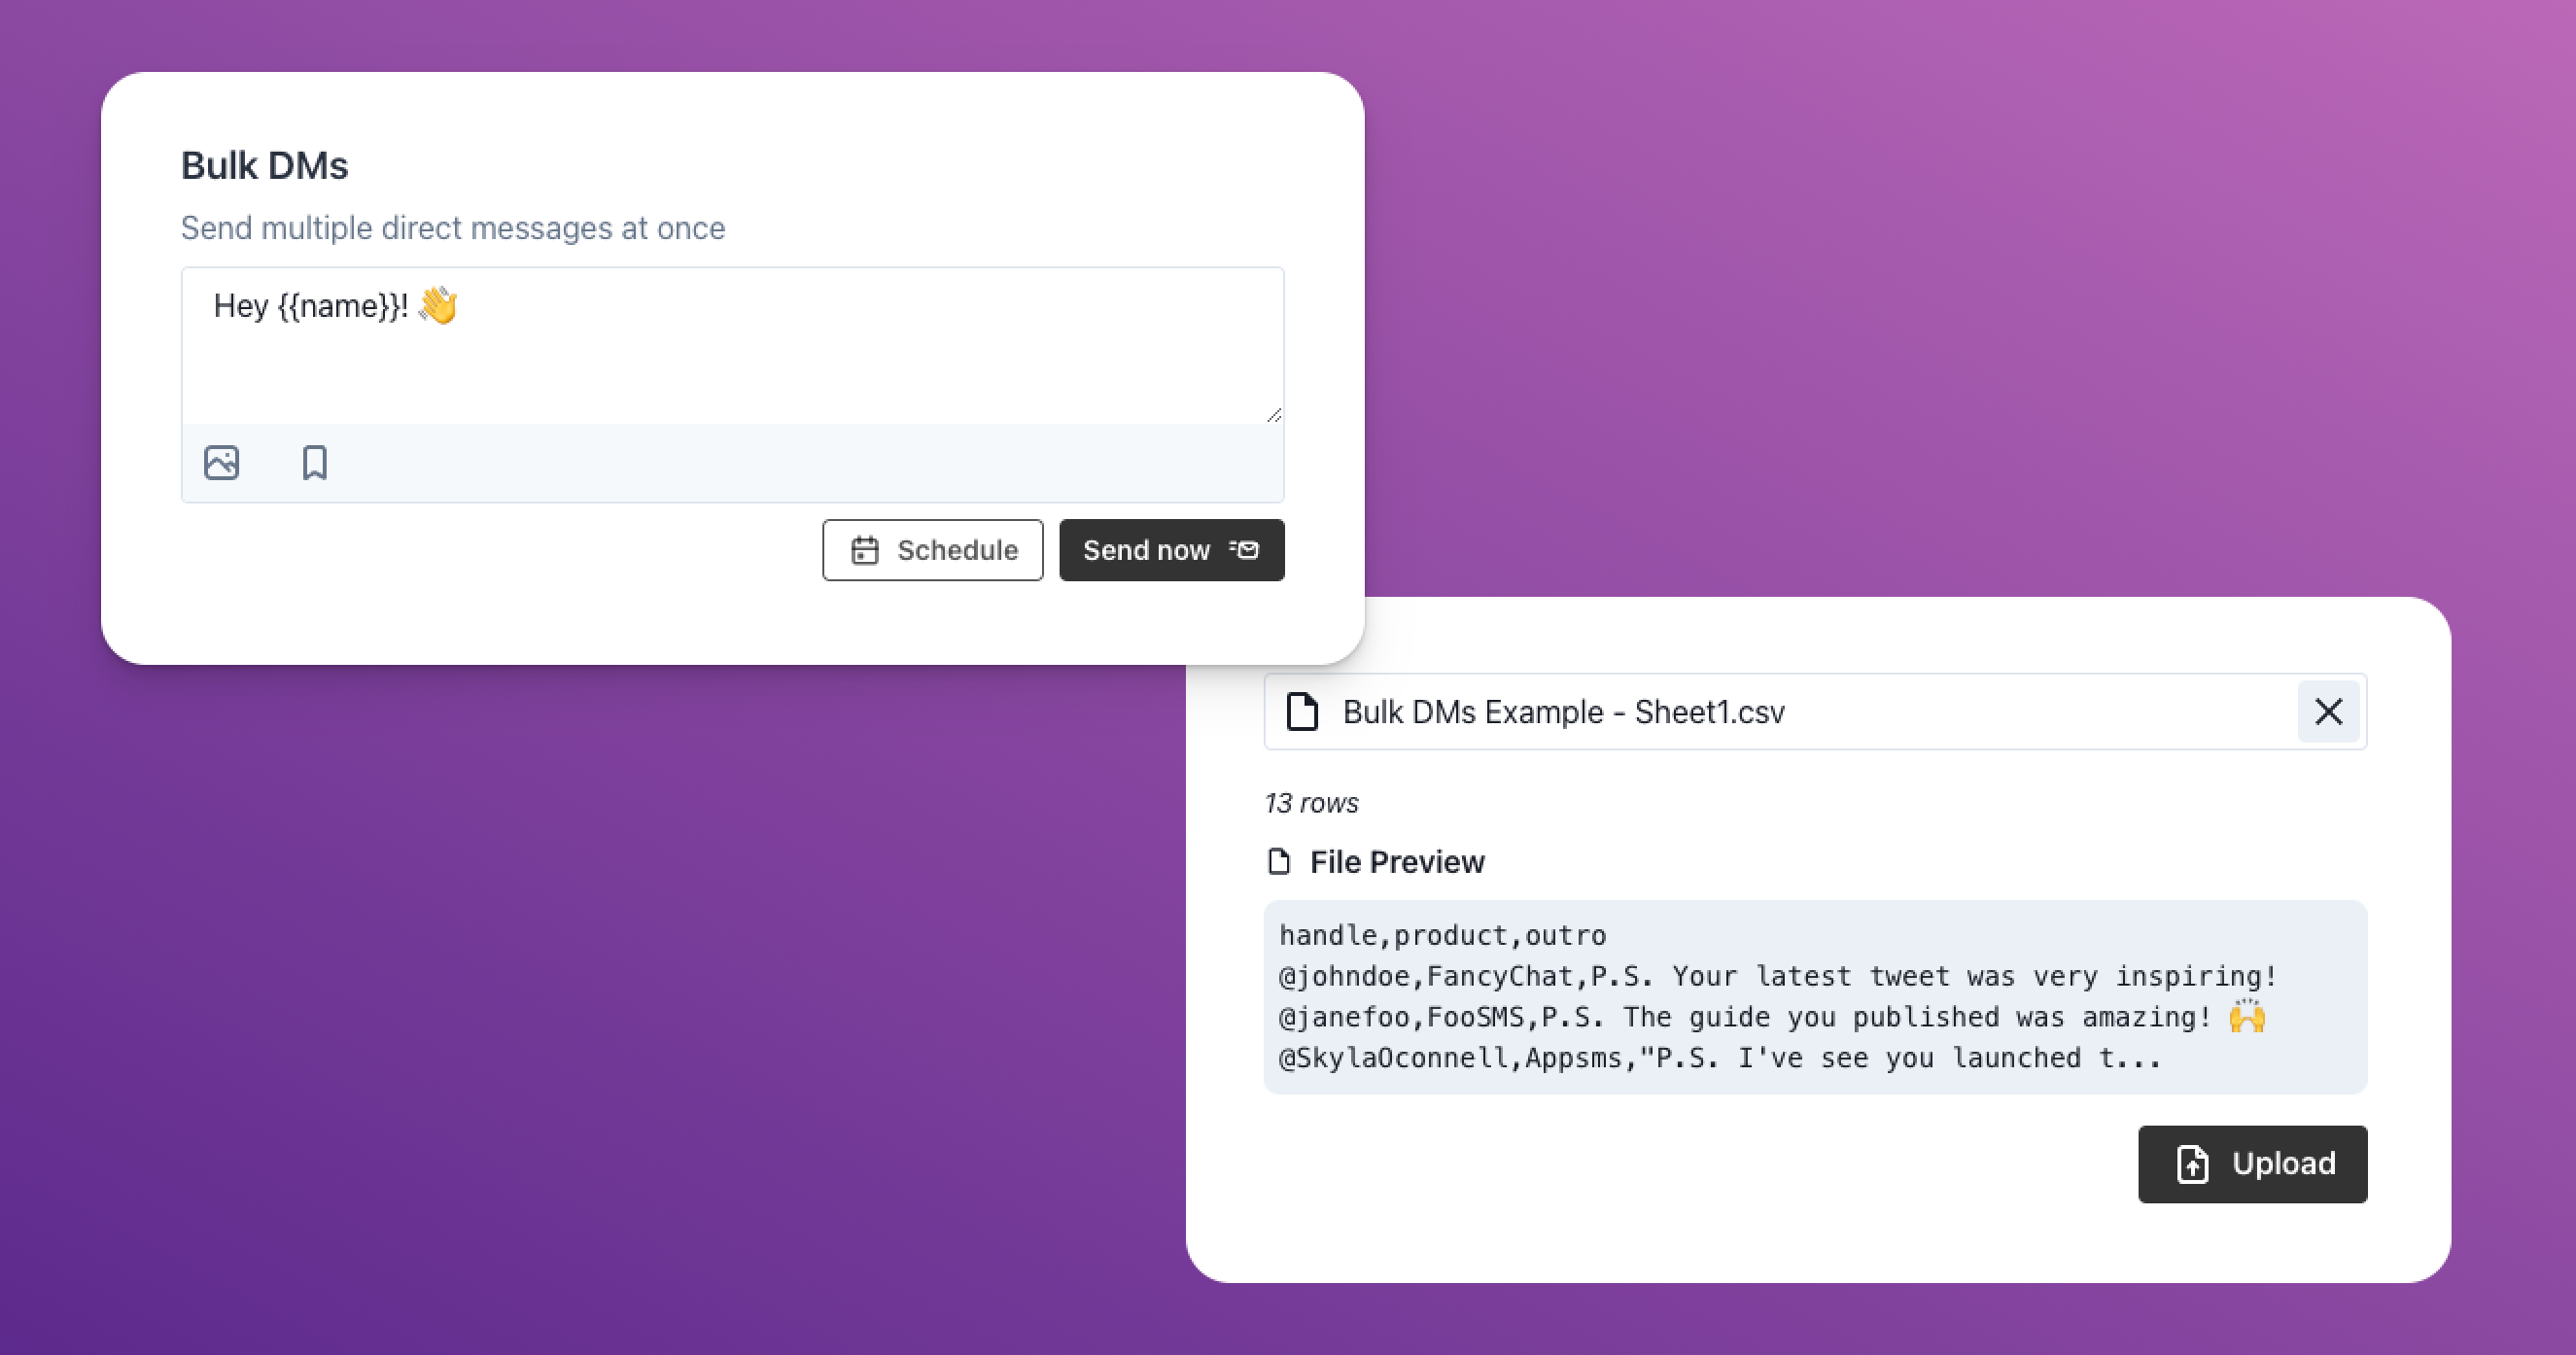
Once the CSV file has been imported, the last step is to write the message and send it.
You can use the custom variables in the text of the message.
The syntax to include a variable is {{variableName}} so for instance, to dynamically include the name of the user, the message must include {{name}}
Here’s an example of a message that makes use of the variables used in this article.

And this is the final message that will be sent, according to the custom variables defined:
Hi John!
I noticed that you are the founder of FancyChat.
I’m the Founder of DeliverySMS, a service that increases the SMS delivery rate to 99.99% — and I thought you would have been interested in knowing more about it.
In that case, drop a reply 🙌
P.S. Your latest tweet was very inspiring!
Cheers,
Matthew
Click on Send now to send messages as soon as possible, or Schedule them in the future.
Sending customized bulk direct messages using a CSV file is a great way to quickly send messages to your contacts. With the help of this guide, you should now have a better understanding of how to do it using Hivoe.
In case of questions, drop a direct message on Twitter or send an email.